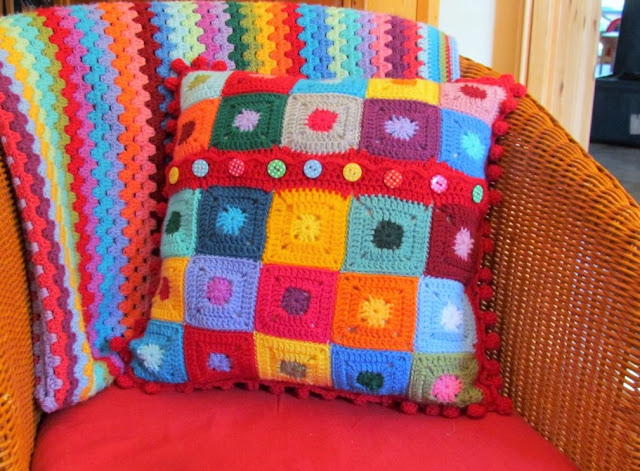
The weather here in Northern Germany is brilliant! We have lots of sun, a little wind and nice temperatures. I even got a little sun burn on my forearms while I was happily crocheting on the terrace yesterday. But I wanted to finish my Lollipop Cushion by all means and it was late in the evening when I sewed on the last button. But now it is done!
And I LOVE it!
I already showed you the beginning of this little project that I started quite impulsively when I looked at all my little yarn scraps that were lying in a yarny bowl.
I really loved playing with all the colours I had left, always wondering if the remaining rest of a colour would be sufficient for a solid granny square.
Very quickly I knew how the front of my cushion should look like and in no time at all I had all the solid grannies I needed. If you look for a good pattern to make them, just have a look at the lovely blog of Heather from little tin bird. Her explanations are very good.
After joining all these colourful grannies, I immediately knew that this cushion would need some extraordinary edging. I thought about so many different patterns but no one really caught my eye. Then I remembered this pompom edging and after a good search on pinterest (I am a Pinterestian, I really am), I found a good explanation of this stitch on the wonderful blog of Robin from once upon a pink moon. The only thing that I change was the number of chains. I wanted the pompoms to stand a little upright, so I just crocheted two chains instead of three.
But then the question of how to do the back occurred again. I had this problem already when I made my first cushion here.
And I really hate that question. Most crocheters write that they just take some fabric they have in their stash and they sew a back with a zipper in a breath.
I am not able to do this! It takes me ages to sew a cushion and when I think about a zipper I sweat blood. So again, I decided to crochet the back. I had enough yarn for more solid granny squares, but I made them differently. Just one more row and I changed colours after the first row.
This is how it turned out in the end and it is such a little colourful piece of joy that I immediately knew how I would call it:
My Lollipop Cushion!
This cushion matches perfectly my handmade blankets. It looks like it just has to sit in front of the Villa Villekulla blanket, doesn't it?
This is the front:
This is the front:
And this is the back:
Which side do you like more? I just can't decide, I like both sides!
The only thing that jarred on my nerves was the sewing. It was a nightmare to sew the back to the front. I had an equal
number of stitches on both sides of the cushion but when I had finished
almost half of the sewing of one side I always recognised that one side was
longer than the other. I don't no how many times I had to undo the
stitches, in the end I didn't count anymore I just tried to get the
squares even. But finally it worked out.

My Dutch readers will probably recognise the buttons I have used, I bought them at HEMA, a Dutch chain of stores that sell wonderful bits and pieces. I just love these colourful buttons and they are perfect for my Lollipop Cushion!
And here is one last photo I want to show you. In April I had won a give-away hosted by the lovely Franca from righedafavola.
This cute little bag is really sweet and I love the cheerful pink. Thanks a lot, dear Franca, best wishes to Italy!
Have a nice and sunny weekend,
Viola


